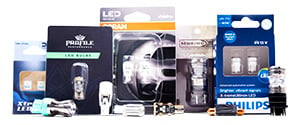
.png)

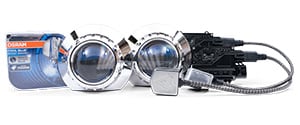
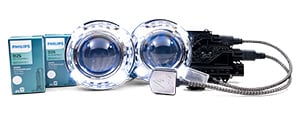
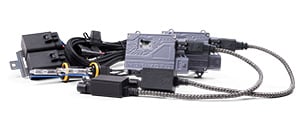
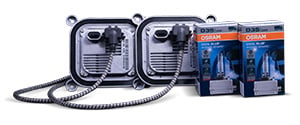
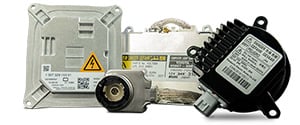


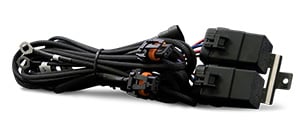
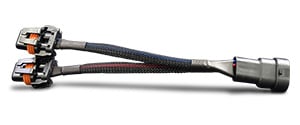

A wire harness is installed so that your factory headlight circuit can control your new HID system properly. Generally speaking you can’t just plug the ballasts into the sockets that powered the halogen bulbs and expect them to work reliably or even at all. A harness not only ensures that the outputs from your car will be converted for compatibility with your ballasts (and projector solenoids if applicable) but also does double duty to provide the right amount of power to these components.
Wiring tends to be one of the more confusing subjects when it comes to a headlight upgrade – which is why we’ve put together a list of questions to ask yourself to arrive at the right solution for your application.
THINGS TO CONSIDER
1. WHAT IS THE ORIGINAL HALOGEN BULB TYPE THAT THE VEHICLE USED FOR ITS LOW BEAM/MAIN HEADLIGHT?
The answer here determines the spec harness you will need. ie 9006, H4, etc consequently, it also determines whether you will need a low beam or bixenon harness, since that’s correlated with the spec on the input. For example, a 9006 harness will be a low beam model, and H4 would be a bixenon model.
2. DOES THE CAR HAVE CAN-BUS SYSTEM?
Can-bus means that the ECU on the vehicle communicates with various components around the car to check and make sure that all of these systems are working properly. It’s an important consideration here because if the ECU senses that the resistance across the headlight circuit is different than it’s programmed to accept as the norm- that’s when you run into problems. Anything from a simple “lamp out” warning on the dash to a constant flicker to the headlights may result.
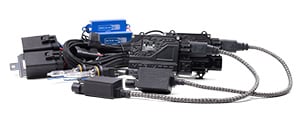
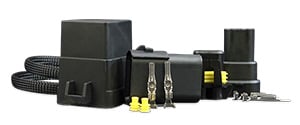
The fix: Typically you just need to add a bit of resistance to the circuit in order to trick the car into thinking that the original headlight bulbs are still plugged in. normal relay harnesses that only plug into one side of the car won’t cut it, since they leave the other factory output completely hanging- so an entirely different harness that utilizes both outputs will be required. Morimoto standalone can-bus harnesses are the suggested recipe for success in most European applications, whereas the Mopar harness series is suggested for most American vehicles with CanBus issues.
3. DID THE VEHICLE COME WITH FACTORY HID’S?
If you’re upgrading or changing the ballasts on a vehicle that came factory equipped with HID headlights, chances are you won’t need any relay harnesses at all. If you’re adding another set of hid ballasts to work alongside the factory hid’s though ( when converting to quad projectors for example) then yes- you want a low beam relay harness. the input spec on the harness will not matter, as you will have to tap into the -/+ input that powers one of the current ballasts anyways.
4. DOES THE CAR HAVE A DAYTIME RUNNING LIGHT (DRL)?
If the car has a daytime running light on the high beam: Don’t worry about it, it has no effect.
If the car has a daytime running light on the low beam and does not have a can-bus system: Use a normal relay harness. The low beam HID will become your DRL.
If the car has a low voltage daytime running light on the low beam and a can-bus system: This poses a problem because the can-bus harnesses won’t provide adequate power to the ballasts and the regular relay harness will trigger a lamp-out warning or flickering. The solution is to disable the DRL preferably. If that’s not technically or legally possible (e.g. if you reside in Canada where all vehicles must have them) then you have to go for the can-bus harnesses and remember to turn your low beams on every time you drive. This will deliver full (instead of half) voltage to the headlight circuit and provide the power that the ballasts need to run without flickering.
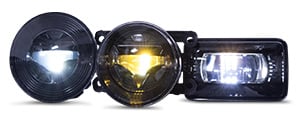
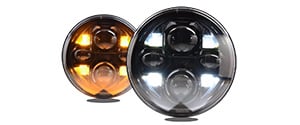
5. ARE YOU DOING A QUAD PROJECTOR RETROFIT?
With a single projector retrofit: There are no more considerations than the ones mentioned above.
With a quad projector retrofit: The chances are that your original headlights were setup with a separate low and high beam bulb. In question one above, you probably selected a low beam harness, like a 9006, H7, or H11. Here, you will need two of those harnesses, since each one will have two outputs. In the end you have outputs for four ballasts triggered off of the two original low beam outputs from the car.
If only one set of the projectors in your quad retrofit are bi-xenons: Then just plug the remaining set of outputs from your car (that used to plug into the halogen high beam bulbs) into the projector solenoids.
If both sets of projectors in your quad retro are bi-xenons: Then you will also need a set of high beam splitters. These will split the signal from the factory high beam plugs into two bixenon projector solenoids per side.
OUR RECOMMENDATION FOR RETROFITTERS
There are only a few important steps in choosing a wire harness. By following the five step buyers guide above and picking out a good quality harness, you should be wired in no time. Our selection of high quality low beam, bi-xenon, and can-bus harnesses from Morimoto will cover every application out there – but if you can’t figure out which one is right for you, no problem. Our team can make a recommendation on what’s best for any application.
FURTHER READING
Low Beam Relay Harness:
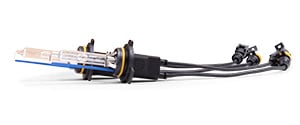
Your factory socket that originally connected to the halogen low beam bulb now switches on a relay. The relay is a switch that draws power from the car battery and sends it out to the ballasts.
Bi-xenon Relay Harness:
A bi-xenon harness is a bit more complicated compared to a standard low beam wire harness. A typical dual-filament halogen bulb has 3 pins: one for the low beam, one for the high beam, and a ground. In low beam or high beam mode; only that pin is receiving a signal from the factory harness. The low beam mode is simple, but in a bi-xenon retrofit, you need the low and high beams powered on at the same time. Otherwise, when you hit the high beams, the projectors will turn to high beam mode but the ballasts will turn off – leaving you with nothing but darkness. A properly configured harness will correct for this problem. There are two ways a bi-xenon harness can be setup to do so.
With a diode:
The diode will be installed between the low and high beam input wires on the harness. A diode is a like a one-way road that lets current flow from the high beam lead into the low beam lead – which not only keeps the relays powering the ballasts but passes through to the bixenon solenoids to activate the hi beam. (For more on how bixenon projectors work, read here).
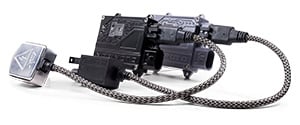
With a control box:
This will control the function of the low and high beams via it’s own specialized/smart circuitry. When the control box reads “low beam input pin active” it will only output power to the ballasts. When the control box reads “high beam input pin active” it knows to send current to the ballasts and the bi-xenon solenoids at the same time. These are more complicated and less serviceable, but often times more universally applicable with positive and ground switched circuits.
Can-Bus Harness:
Simply put, our standalone can-bus harnesses plug draw power directly from the factory outputs and supplies it to the ballasts. They incorporate a resistor to fool the ECU into thinking the original halogen bulbs are still installed (preventing error codes) and also a capacitor, to provide a short burst of current to the ballasts on ignition. Once lit, the ballasts rely on the normal ~12v to operate.
High Beam Splitter:
These split the signal from the high beam output into two different high beam sources. Whether you will be running a bixenon projector alongside an existing halogen high beam or two bixenon projectors per headlight, these will take care of the required connections.
Ground switched vs. Positive switched harnesses:
Positively switched headlights are much more common, but a lot of applications nowadays run what is known as ground switched headlights. (Toyotas, Subaru’s, Volkswagon’s for example) The difference here is in pin that becomes active to complete the circuit, and thus trigger the harness to activate the headlights. In the more common positively switched setups, the ground is constant and the positive pin switches on and off. In ground switched setups, the positive pin stays hot, and the system is grounded when the headlight switch is turned on inside the cabin.
When can-bus harnesses aren’t enough:
The best way to battle an incessant flicker problem is installing a 4700uF capacitor in between the positive and ground wire’s on the input line to a normal relay harness. Despite any pulsing signals from the factory harness, the inline capacitor will store a charge and release it smoothly into the relays for uninterrupted operation.
Characteristics of well-built harnesses:
— Thick gauge wiring (14-16 gauge) to ensure adequate power delivery
— In-line fuses with the positive battery lines to prevent damage to other components
— one relay per ballast, so if one fails the other will remain functional
— weather proof outputs for the accessories
— corrosion resistant fittings for the relays and other contacts
— protective sheathing such as tech flex or convoluted tubing